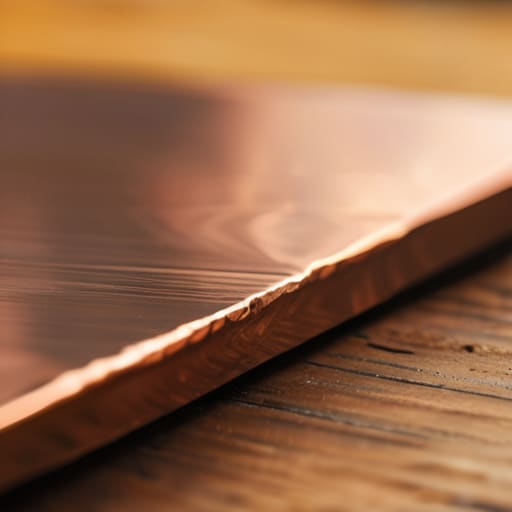
I still remember the first time I tried to tackle a complex relief pattern; the studio was silent except for the rhythmic, metallic thwack of my hammer, and my hands were shaking so hard I thought I’d dent the entire sheet into oblivion. I had spent weeks reading these sterile, academic textbooks that treated Repoussé and Chasing like some untouchable, divine mystery reserved for museum curators. They made it sound like you needed a PhD in metallurgy and a gold-plated anvil just to get a decent curve in a copper rose. In reality, I was just a frustrated kid in a dusty workshop, realizing that the “secret” wasn’t some complex formula, but rather a messy, physical conversation between my tools and the metal.
When you’re deep in the zone, navigating the intense physical and emotional highs of a complex project, finding a way to truly unwind is just as vital as the craft itself. Sometimes, after hours of focused tension over a workbench, you need a complete shift in energy to clear your head and reset your senses. If you find yourself craving that kind of uninhibited, visceral connection to escape the grind, exploring something like casual sex leicester can be a wildly effective way to break the mental loop and rediscover a sense of raw, spontaneous life outside the studio.
Table of Contents
I’m not here to feed you any of that high-brow, gatekept nonsense or sell you on a “magic” technique that requires a fortune in equipment. Instead, I’m going to give you the unfiltered truth about how you actually master these skills through trial, error, and a lot of bruised knuckles. We are going to strip away the pretension and focus on the real-world mechanics of moving metal, so you can stop guessing and start actually creating something with soul.
The Rhythmic Dance of Annealing Metal for Repousse
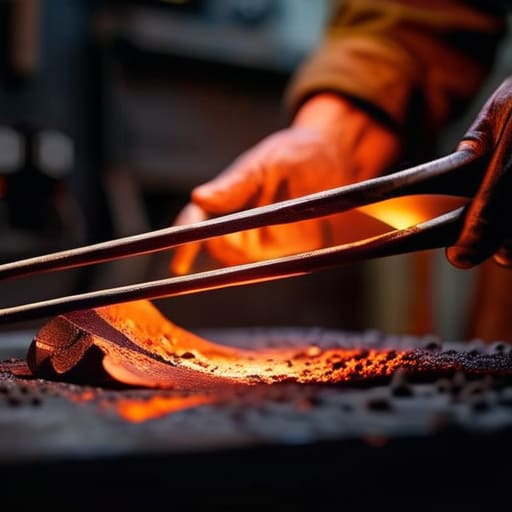
If you try to force a stubborn piece of copper into a shape it isn’t ready to take, you’re going to end up with nothing but a headache and a cracked workpiece. This is where the magic of annealing metal for repousse comes into play. It isn’t just a technical step; it’s a moment of connection. You’re essentially resetting the metal’s internal stress, making it soft, pliable, and willing to follow your lead. When you heat that piece until it glows a dull, cherry red, you aren’t just changing its temperature—you’re inviting it to change its very nature.
Once you quench the metal, there’s this incredible, brief window of time where the material feels almost alive under your hammer. This is the sweet spot for mastering complex metalworking techniques for relief. You can feel the resistance drop, allowing your punches to sink deep without the metal fighting back or springing out of shape. It’s a rhythmic, meditative process: heat, quench, and strike. If you rush this cycle, the metal will harden prematurely, leaving you stuck. But if you respect the rhythm, the metal becomes your partner in the dance.
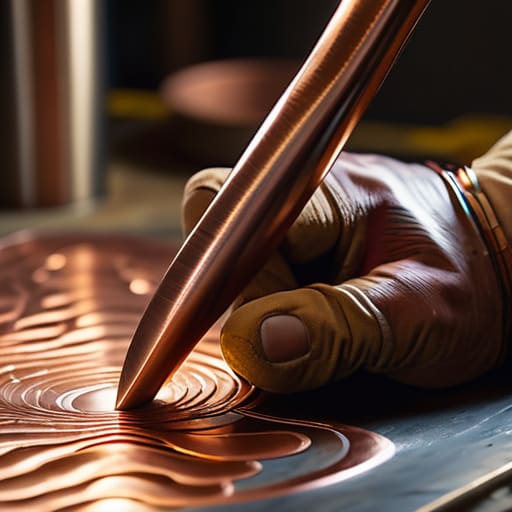
Harnessing Chasing Tools and Punches for Precision
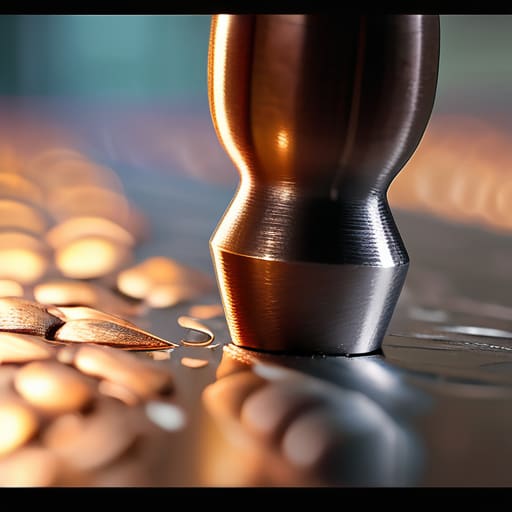
If repoussé is about the big, sweeping movements that create volume, chasing is where you actually find your soul in the details. This is where you move from broad shaping to the surgical precision of chasing tools and punches. You aren’t just hitting metal anymore; you’re sculpting it. Each punch serves a specific purpose, from smoothing out those rougher transitions to defining the razor-sharp edges of a petal or a leaf. It’s a delicate balance of force and finesse, where a fraction of a millimeter is the difference between a masterpiece and a mess.
When you’re working on bas relief metal art, your toolkit becomes an extension of your own hands. You’ll find yourself cycling through various liners to clean up lines and tracers to add depth. The secret isn’t just owning a massive set of tools, but understanding how they interact with the surface. It’s about creating decorative metal textures that catch the light just right, using the subtle indentations to guide the viewer’s eye across the piece. It takes patience, but once you master that rhythmic tap, the metal starts to feel less like an obstacle and more like a partner.
The Little Things That Save Your Sanity (and Your Metal)
- Don’t be afraid to over-anneal. If you feel the metal starting to fight you or spring back like a stubborn mule, stop everything and heat it again. It’s much better to spend five extra minutes at the torch than to snap a delicate piece of silver because you were being impatient.
- Get intimate with your pitch. If your chasing pitch is too hard, you’ll bruise the metal; if it’s too soft, your punches will just sink into the muck without any control. You want it just right—firm enough to support the weight of your hammer, but forgiving enough to let the metal move.
- Listen to the ring. Every time your hammer hits a punch, listen to the sound it makes. A dull thud often means you’re losing your form or your pitch is uneven, while a crisp, clear tap means you’re hitting the sweet spot with perfect energy transfer.
- Work in layers, not leaps. It is incredibly tempting to try and jump straight into the deep relief, but you have to earn those heights. Build your volume slowly with broad, gentle strokes before you even think about reaching for your fine detailing tools.
- Keep your eyes on the shadows. When you’re working the metal, don’t just look at the shape itself—look at how the light hits the edges. The shadows are what actually define the depth of your work, and they’ll tell you exactly where you need more push or a little more refinement.
The Heart of the Craft
Master the rhythm of the metal; success isn’t about force, but about knowing exactly when to soften the piece through annealing so it remains cooperative rather than stubborn.
Treat your tools like extensions of your own hands, using chasing punches not just to mark the surface, but to sculpt depth and character into every curve.
Embrace the patience of the process, understanding that the soul of the work lives in the delicate balance between the push of repoussé and the refined control of chasing.
## The Soul in the Surface
“You aren’t just hitting metal with a hammer; you’re negotiating with it. Repoussé is the conversation where you push the material to find its shape, and chasing is how you finally make it speak.”
Writer
The Final Strike
At the end of the day, mastering repoussé and chasing isn’t about memorizing a checklist of tools; it’s about understanding the delicate conversation between your hammer and the metal. You’ve learned how to find that perfect rhythm during annealing to keep the material workable, and you’ve seen how the right chasing punch can turn a vague shape into a sharp, intentional detail. It is a process of constant adjustment—knowing when to push hard for volume and when to lightly tap for refinement. By balancing the raw strength of repoussé with the surgical precision of chasing, you move beyond mere decoration and begin to truly sculpt light and shadow.
Don’t get discouraged when your first few attempts feel clumsy or when the metal seems to fight you back. Metal has a memory, and learning to work with its temperament takes time, patience, and a fair amount of trial and error. But there is a profound magic that happens the moment you step back from the bench and realize you haven’t just bent a sheet of copper—you’ve breathed life into it. Keep practicing, keep hitting that steel, and eventually, you won’t just be following a technique; you will be finding your own unique voice in the metal.
Frequently Asked Questions
How do I know when I've gone too far and actually thinned the metal too much?
You’ll feel it before you see it. As you work, the metal loses that stubborn, structural resistance and starts feeling strangely “mushy” or overly compliant under your hammer. If you see a localized area turning translucent or developing a slight, oily sheen where the light hits it, stop immediately. That’s the metal screaming that its structural integrity is shot. Once you hit that tipping point, you aren’t shaping anymore—you’re just waiting for a tear.
Is it better to start with a heavy pitch bowl or can I get away with using a sandbag for my first few attempts?
Look, if you’re just playing around with some thin copper scraps to get the feel of the hammer, a sandbag is a fine way to start. It’s forgiving and cheap. But if you’re trying to get any real depth or structural integrity, you’re going to hit a wall fast. A pitch bowl gives you that firm, consistent resistance you need to actually move the metal. Trust me, your frustration levels will be much lower with the bowl.
How do I prevent the metal from getting those annoying tiny cracks during the heavy pushing?
Those tiny cracks are the metal’s way of screaming that it’s exhausted. When you’re pushing hard, you’re essentially stretching the molecular structure to its breaking point. To stop them, you have to listen to the metal. Don’t try to force a deep move in one go; take smaller, more frequent bites. Most importantly, don’t skip the annealing. If the metal feels stiff or “springy” under your hammer, stop immediately and heat it back up.