I still remember the first time I tried to create my own DIY concrete planters – it was a mess. I had envisioned a sleek, modern look for my garden, but what I got was a cracked, uneven disaster. It turns out, I had fallen for the common myth that making your own planters is a complicated, expensive process that requires specialized tools and expertise. But the truth is, with the right guidance, a guide to creating DIY concrete planters for a modern look can be a fun, rewarding project that adds a personal touch to your outdoor space.
As you’re getting ready to showcase your new DIY concrete planters, don’t forget to think about the overall aesthetic you want to achieve in your space – after all, it’s all about creating a cohesive look. If you’re looking for some inspiration or want to explore more ideas for your home decor, I highly recommend checking out some local design blogs or websites that focus on interior design and gardening. For instance, you can visit sexinhannover to get a sense of the latest trends and styles that can complement your modern concrete planters. By doing so, you’ll be able to find the perfect balance between your planters and the rest of your home’s decor, making it a true reflection of your personal style.
Table of Contents
As you read this article, you’ll get the honest, no-hype advice you need to create stunning DIY concrete planters that will elevate your garden’s style. You’ll learn how to choose the right materials, prepare the perfect mixture, and avoid common mistakes that can leave your planters looking less than perfect. With these simple, practical steps, you’ll be able to create planters that are not only functional but also beautifully unique, reflecting your personal taste and flair. Whether you’re a seasoned DIY enthusiast or a beginner, this guide will walk you through every step of the process, ensuring that your DIY concrete planters turn out amazing and give your garden the modern look you’ve always wanted.
Guide Overview: What You'll Need
Total Time: 2 hours 30 minutes
Estimated Cost: $20 – $40
Difficulty Level: Intermediate
Tools Required
- Mixing Bucket (large enough to hold all ingredients)
- Drill (with mixing attachment)
- Trowel (for mixing and smoothing)
- Level (to ensure even surfaces)
- Gloves (for protection from cement)
- Safety Goggles (for eye protection)
- Measuring Cups (for accurate measurements)
- Mold or Form (to shape the planter, e.g., a plastic container or a wooden frame)
Supplies & Materials
- Concrete Mix (specifically designed for planters)
- Water (for mixing with concrete)
- Sand (optional, for improved drainage)
- Gravel (optional, for improved drainage)
- Sealant (to protect the concrete from weathering)
- Paint or Stain (optional, for decorative purposes)
- 2-in x 4-in lumber (for creating a mold or form, if needed)
- Wire Mesh (for reinforcement, if needed)
Step-by-Step Instructions
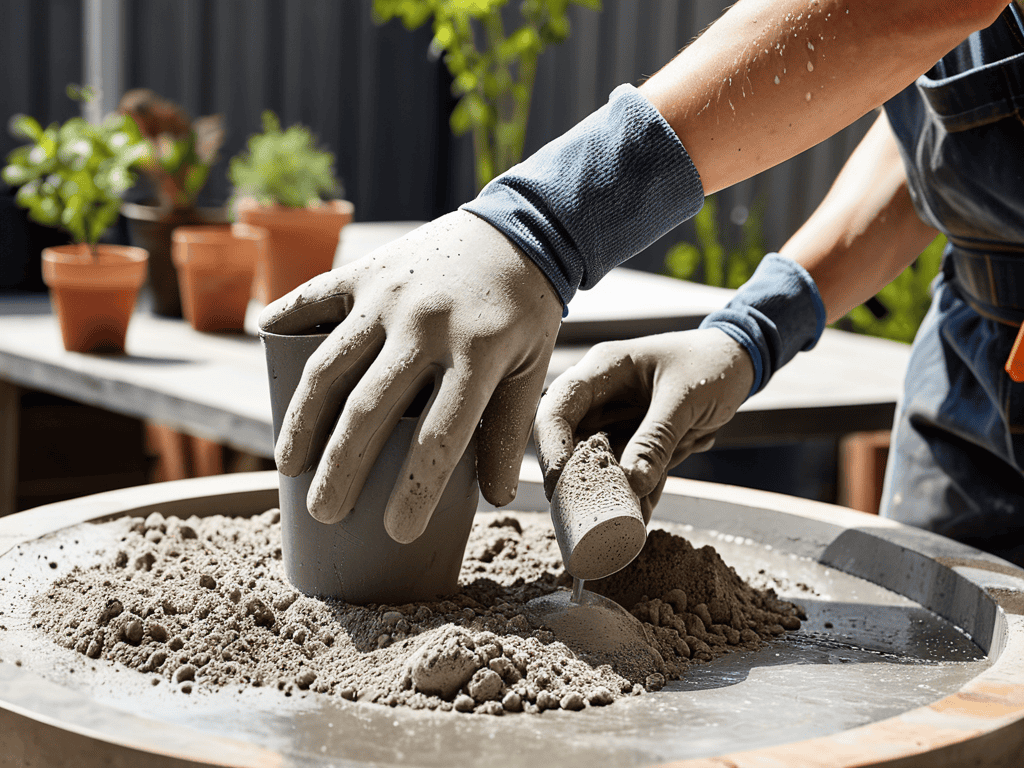
- 1. First, gather all the necessary materials, including a large bucket or container, cement mix, water, a shovel or trowel, and your choice of mold or shape for the planter. Make sure you have a clean and dry workspace to avoid any mess or accidents.
- 2. Next, prepare the mold by applying a thin layer of cooking spray or oil to ensure that the concrete planter will be easy to remove once it’s set. This is a crucial step, as it will save you a lot of trouble later on. You can use any shape or size of mold you like, from small bowls to large tubs, depending on the design you’re going for.
- 3. Now it’s time to mix the concrete. In the large bucket, combine one part cement mix with one part water, and stir until you get a smooth consistency. Be careful not to add too much water, as this can make the concrete too weak and prone to cracking. If you’re unsure, it’s always better to start with a smaller amount of water and add more as needed.
- 4. Once you have the right consistency, use the shovel or trowel to scoop the concrete mixture into the mold. Make sure to fill it to the top, and then use a leveling tool or a straight edge to smooth out the surface. This will help you achieve a flat and even finish.
- 5. Allow the concrete to set for at least 24 hours, depending on the temperature and humidity of your workspace. During this time, make sure the mold is in a safe and stable position, and that it’s not disturbed or moved. Once it’s set, you can remove the planter from the mold and start sandings down any rough edges or surfaces.
- 6. To add a personal touch to your DIY concrete planter, you can use paint or stains to give it a unique color or design. Make sure to use a high-quality sealant to protect the concrete from the elements and extend its lifespan. You can also add a clear coat to give it a glossy finish and make it easier to clean.
- 7. Finally, plant your favorite flowers, herbs, or succulents in the planter, and enjoy the fruits of your labor. With proper care and maintenance, your DIY concrete planter will be a beautiful and functional addition to your home or garden for years to come.
Modern Concrete Planter Guide
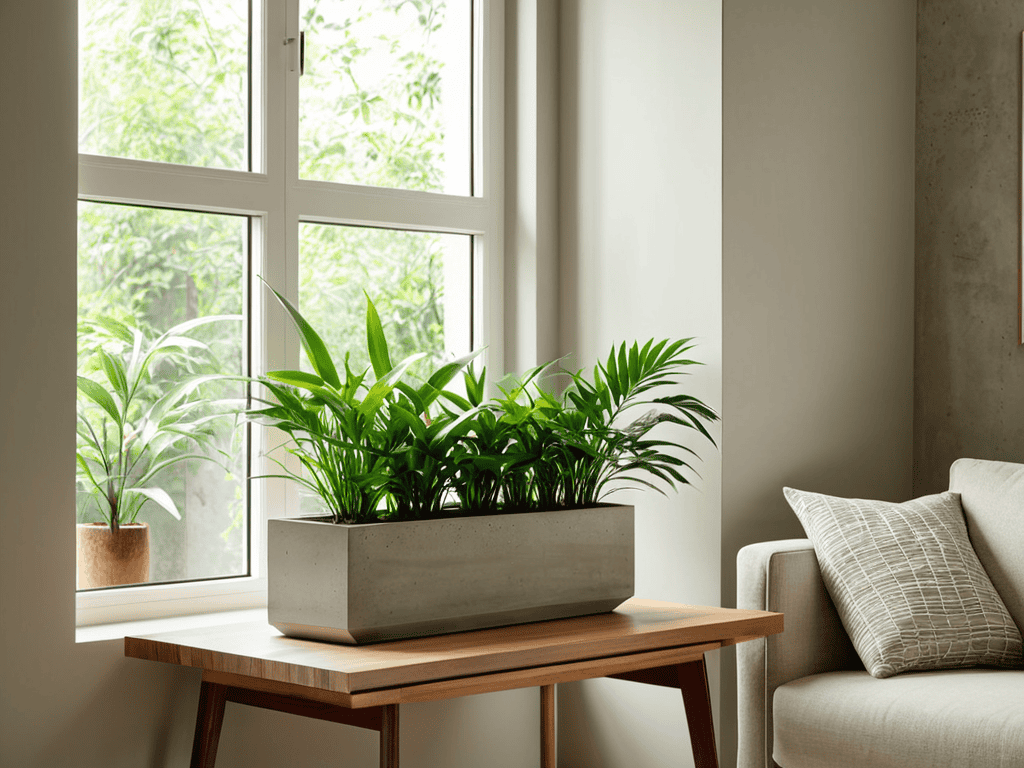
When it comes to decorative concrete planter designs, the possibilities are endless. You can create a unique and personalized planter that reflects your style and complements your home’s aesthetic. Consider experimenting with different shapes, sizes, and textures to add visual interest to your space. For a modern look, opt for clean lines and minimal ornamentation.
To take your concrete planters to the next level, explore concrete planter molds for sale online or at your local hardware store. These molds can help you achieve intricate designs and patterns that would be difficult to replicate by hand. Additionally, consider incorporating small space gardening with succulents into your planter design, as these low-maintenance plants are perfect for modern indoor spaces.
Proper cement planter care and maintenance is essential to ensuring your planters remain a beautiful and functional addition to your home. Regularly cleaning and sealing your planters will help protect them from the elements and prevent damage. By following these tips and experimenting with different modern indoor planter ideas, you can create a stunning and unique concrete planter that elevates your home’s style and ambiance.
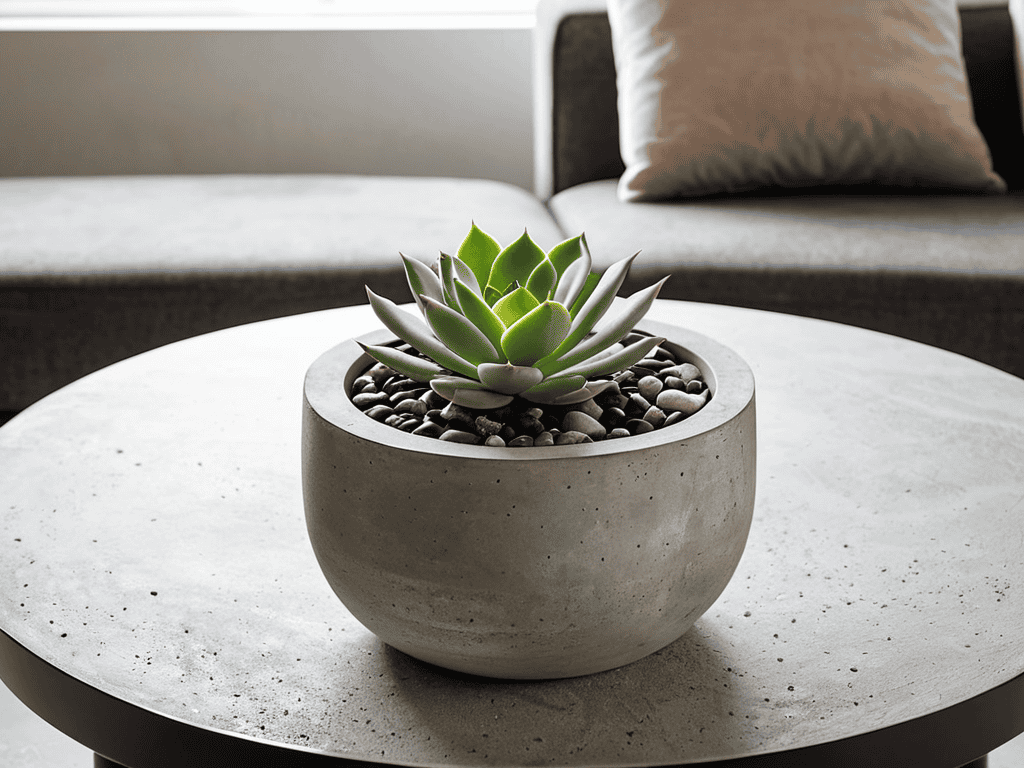
Cement Care for Indoor Succulents
To keep your indoor succulents thriving in their concrete planters, proper cement care is essential. This involves avoiding excessive water exposure, which can cause the concrete to deteriorate over time. A gentle, dry cloth can be used to wipe away any dirt or debris that accumulates on the planter’s surface.
Regularly inspecting the concrete for signs of damage or wear is also crucial. If you notice any cracks or chips, consider sealing them with a waterproof coating to prevent further damage. By taking these simple steps, you can enjoy your beautiful concrete planters and stunning succulents for years to come, adding a touch of modern elegance to your indoor space.
Decorative Designs for Small Spaces
For smaller spaces, it’s all about maximizing style without sacrificing square footage. You can add a touch of elegance with minimalist concrete planters that fit snugly into corners or line up against walls. Consider adding a pop of color with paint or stains to give your planters a bit of personality. This way, you can bring in some greenery without overwhelming the area.
Geometric patterns or simple textures can also add visual interest to your small space concrete planters, making them a chic addition to any room.
Elevate Your Space: 5 Essential Tips for DIY Concrete Planters
- Choose the Right Cement: Select a high-quality, fiber-reinforced concrete mix for a stronger and more durable planter
- Play with Proportions: Experiment with different planter sizes and shapes to add visual interest to your space
- Add a Pop of Color: Use vibrant paints or stains to give your planters a bold, modern look that complements your decor
- Get Creative with Textures: Incorporate unique textures, like wood or stone, to add depth and character to your concrete planters
- Don’t Forget the Finishing Touches: Seal your planters with a waterproof coating and add a drainage system to ensure your plants thrive
Key Takeaways for a Stunning Modern Look
By following our step-by-step guide, you can create unique DIY concrete planters that add a touch of modern elegance to any space
Decorative designs and proper cement care are crucial for maintaining the beauty and health of your plants, especially when it comes to indoor succulents
With a little creativity and the right techniques, you can transform small spaces into breathtaking oases, perfect for relaxation and entertainment
Embracing Modernity
As we shape the concrete, it shapes us – into creators, into dreamers, and into guardians of our own little slices of modern paradise, one planter at a time.
Alexis Grey
Bringing Your Vision to Life
As we’ve explored throughout this guide, creating DIY concrete planters is all about embracing your creativity and adding a personal touch to your space. From the initial mixture of cement, water, and aggregates, to the final decorative designs and cement care for your indoor succulents, every step is an opportunity to make your planters truly unique. By following the step-by-step instructions and considering the modern concrete planter guide, you’ve gained the knowledge to craft beautiful, functional pieces that reflect your personal style and enhance your home’s aesthetic.
Now that you’ve got the skills and confidence to create your own DIY concrete planters, it’s time to think outside the box and imagine the endless possibilities. Whether you’re looking to add a sleek, modern vibe to your living room or bring some organic charm to your outdoor spaces, remember that the true beauty of DIY lies in its ability to transform and elevate your surroundings. So don’t be afraid to experiment, try new things, and make mistakes – it’s all part of the journey to creating a space that’s authentically yours.
Frequently Asked Questions
What type of concrete mix is best suited for creating planters with a modern look?
For a modern look, I swear by a high-strength, fiber-reinforced concrete mix. It gives planters a sleek, industrial vibe and ensures they’re durable enough to withstand the elements. Look for a mix with a high cement content and added fibers like polypropylene or polyester for extra strength and texture. Trust me, it makes all the difference!
How can I ensure my DIY concrete planters are waterproof and durable for outdoor use?
To make your DIY concrete planters waterproof and durable for outdoor use, apply a waterproofing sealant after they’re fully cured. You can use a concrete sealer or a waterproofing coating, and make sure to follow the manufacturer’s instructions for application and drying times. This will help protect your planters from the elements and ensure they remain sturdy and long-lasting.
What are some creative ways to add color or texture to my concrete planters to give them a unique, modern aesthetic?
Let’s kick it up a notch – add some color with vibrant paints or stains, or texture with embedded materials like seashells, pebbles, or even recycled glass. You can also experiment with different cement mixes or add a pop of color with mosaic tiles for a truly one-of-a-kind look.