I still remember the day I decided to ditch that old light fixture in my living room – it was a game-changer. But, I have to admit, I was nervous about how to replace a dated light fixture safely. I’d heard horror stories about people getting electrocuted or causing a fire. As it turns out, most of those stories are exaggerated, and with the right guidance, replacing a light fixture can be a breeze. The truth is, it’s not as complicated as everyone makes it out to be. In fact, learning how to replace a dated light fixture safely is a great way to give your home a fresh new look without breaking the bank.
So, what can you expect from this article? I’ll be sharing my personal experience and no-nonsense advice on how to replace a dated light fixture safely. I’ll walk you through the entire process, from preparing your space to installing the new fixture. My goal is to provide you with practical tips and honest guidance so you can tackle this project with confidence. By the end of this article, you’ll be equipped with the knowledge to safely and successfully replace your outdated light fixture, and give your home the stylish update it deserves.
Table of Contents
Guide Overview: What You'll Need
Total Time: 1 hour 30 minutes
Estimated Cost: $50 – $100
Difficulty Level: Intermediate
Tools Required
- Voltage Tester to ensure safety
- Needle-Nose Pliers for wire handling
- Screwdriver flathead and Phillips
- Ladder sturdy, 6 feet tall
- Wire Strippers for 12 inches or 14 inches wire
Supplies & Materials
- New Light Fixture compatibility with existing wiring
- Wire Nuts assorted sizes
- Mounting Screws 1 inch or 1.5 inches long
- Electrical Tape for insulation and protection
Step-by-Step Instructions
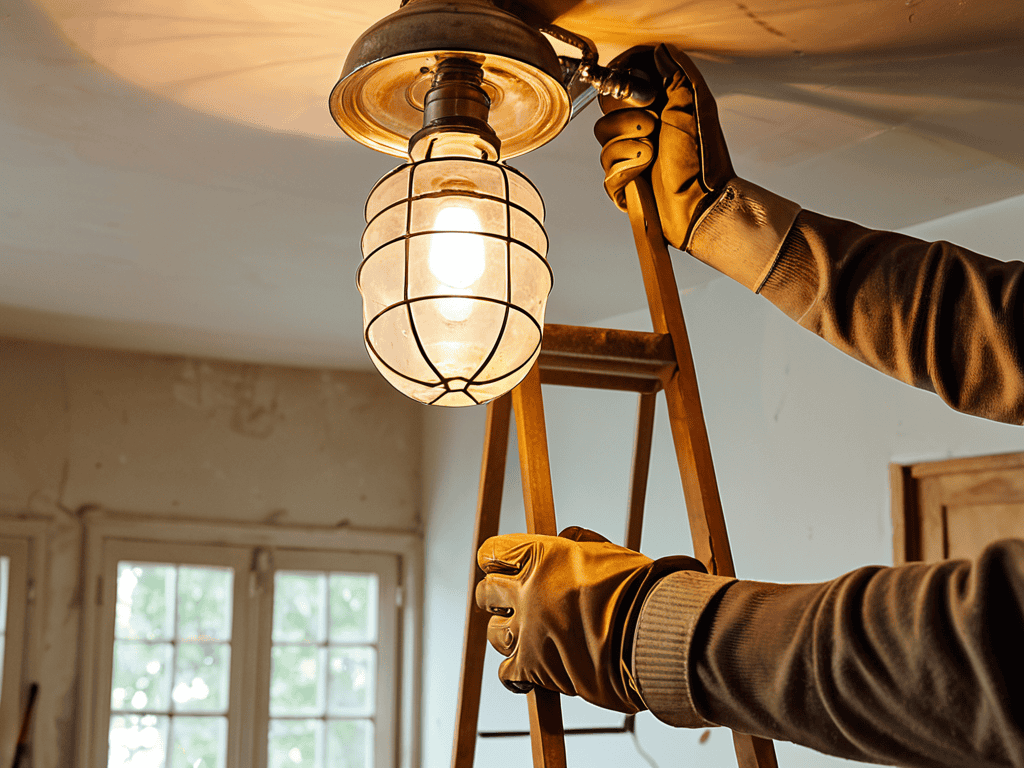
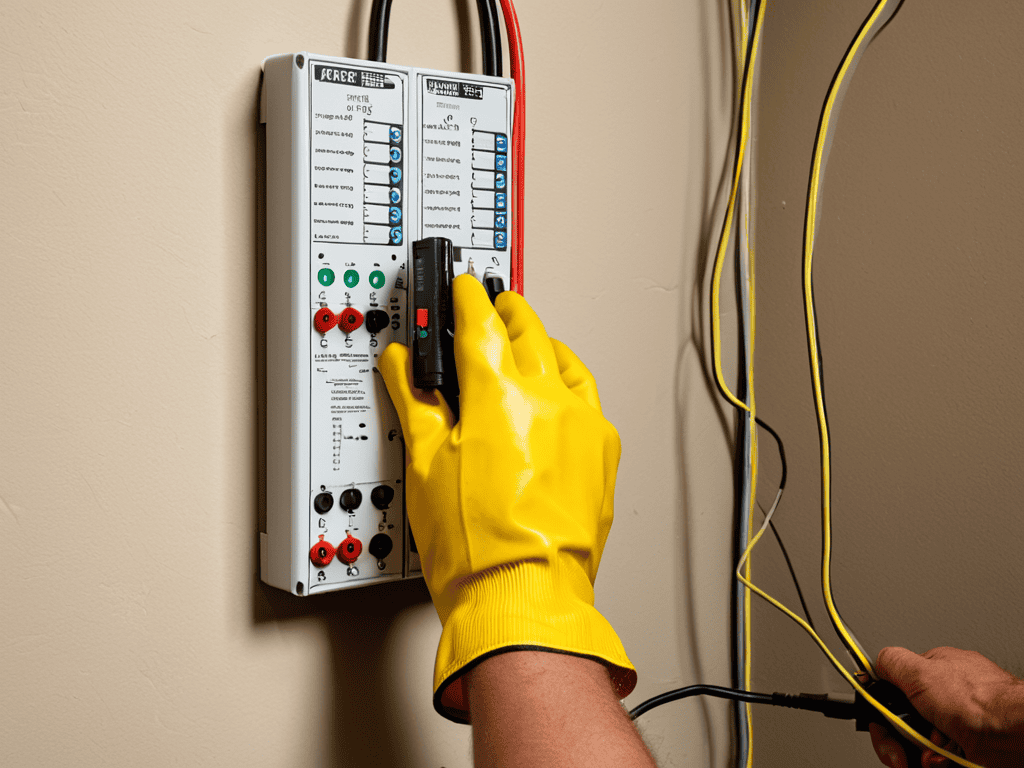
- 1. First, turn off the power to the light fixture at the electrical panel or breaker box. Verify that the light is completely dark before starting the replacement process. This is a crucial step to ensure your safety while working with electrical components.
- 2. Next, remove any glass covers or shades from the existing light fixture. This will give you clear access to the fixture and prevent any accidental damage to the glass components. Set the removed parts aside in a safe place where they won’t get broken or lost.
- 3. Now, disconnect the wires carefully. You’ll typically find black (hot), white (neutral), and copper (ground) wires. Use a voltage tester to double-check that there’s no electricity flowing through the wires. Once confirmed, proceed to disconnect the wires from the old fixture, taking note of which wire goes where for the new installation.
- 4. After disconnecting the wires, remove the old fixture from the ceiling or wall. This might involve removing screws or clips that hold the fixture in place. Be gentle, as the fixture might be heavier than it looks, and you don’t want it to fall and potentially cause injury or damage.
- 5. With the old fixture removed, inspect and clean the area. Make sure there are no leftover screws, dust, or debris that could interfere with the new installation. A clean slate will ensure a secure and proper fit for your new light fixture.
- 6. Next, prepare the new fixture for installation. Read through the manufacturer’s instructions to understand any specific requirements for your particular model. Remove any packaging, and if necessary, attach the mounting hardware according to the instructions.
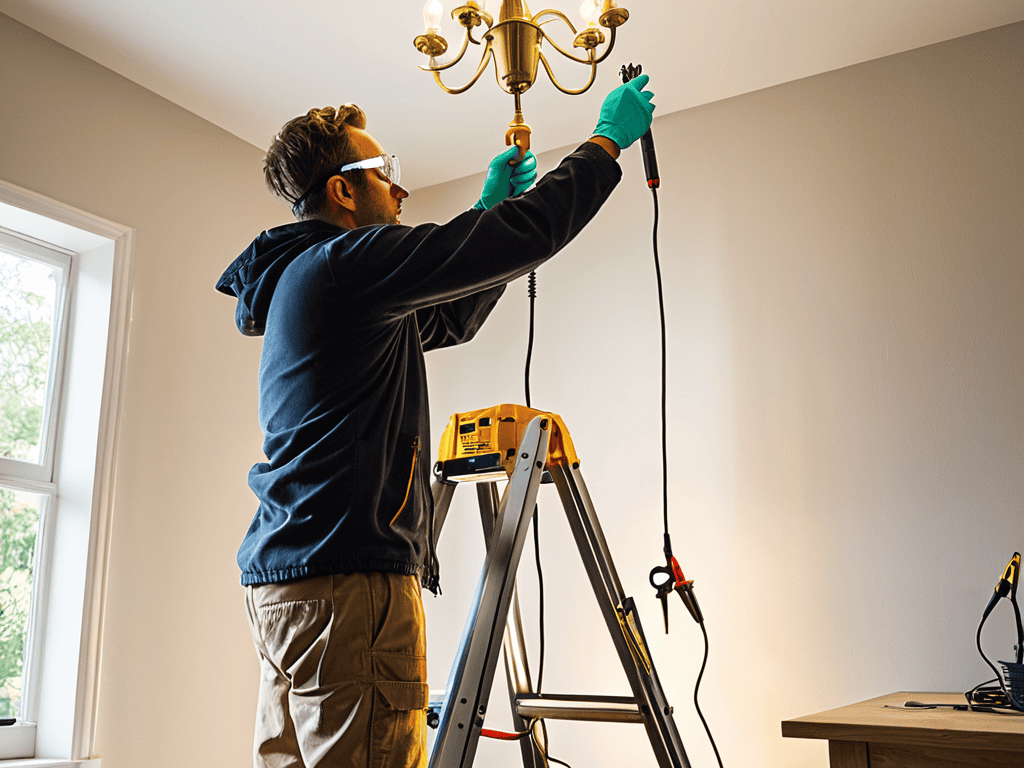
- 7. Now, mount the new fixture. Follow the manufacturer’s instructions for securing the new light fixture to the ceiling or wall. Ensure all screws or clips are tightened firmly but avoid overtightening, which could damage the fixture or the surrounding surface.
- 8. After the new fixture is securely in place, reconnect the wires. Match the wires to their corresponding connections on the new fixture, ensuring that the black (hot), white (neutral), and copper (ground) wires are correctly attached. Double-check your connections to avoid any electrical issues.
- 9. Finally, replace any glass covers or shades you removed earlier. Turn the power back on at the electrical panel and test the light to make sure it’s working properly. If everything looks and functions as expected, you’ve successfully replaced your dated light fixture safely and stylishly.
Safe Fixture Replacement
When it comes to safety precautions for electrical work, it’s essential to take your time and not rush the process. This means turning off the power to the circuit at the main electrical panel, and verifying that the light is completely dark before starting the replacement. Understanding wiring diagrams can also be a huge help, as it will give you a clear idea of what you’re dealing with.
Choosing the right light fixture is also crucial, as it needs to be compatible with your home’s electrical system. Consider energy efficient lighting options, such as LED bulbs, which can help reduce your energy consumption and save you money in the long run.
If you’re not comfortable with the replacement process, hiring a licensed electrician may be the best option. They will be able to assess the situation and provide a safe and efficient solution, avoiding common lighting fixture installation mistakes that can be costly and even dangerous.
Choosing Efficient Lighting Options
When selecting a new lighting fixture, consider energy efficiency to save on your utility bills and reduce environmental impact. Look for options with LED bulbs or smart lighting systems that adjust brightness and color based on the time of day. These not only provide better lighting but also use significantly less energy than traditional fixtures. Additionally, think about the style and ambiance you want to create in the room, as this will help narrow down your choices.
Choose fixtures with the Energy Star label, indicating they meet energy efficiency standards set by the U.S. Environmental Protection Agency. This simple step can make a big difference in your home’s overall energy consumption and help you achieve a safer, more sustainable lighting solution.
Understanding Safety Precautions
When it comes to replacing a light fixture, safety should always be top of mind. You’re dealing with electricity, after all, and that demands respect. Make sure you switch off the power to the circuit at the main electrical panel before you start tinkering. Verify that the light is completely dark and cool to the touch before beginning work. It’s also a good idea to test the wires with a non-contact voltage tester to ensure there’s no electricity flowing through them.
Understanding these precautions can save you from potential shocks or even fires. Take a moment to familiarize yourself with the fixture’s wiring and any specific safety recommendations from the manufacturer. This simple step can make all the difference in a successful and safe replacement process.
Shining a Light on Safety: 5 Key Tips for a Smooth Replacement
- Turn off the power: Ensure the electricity to the fixture is completely shut off before starting the replacement process
- Use the right tools: Gather a voltage tester, a screwdriver, and a ladder to make the replacement process safe and efficient
- Remove the old fixture with care: Take your time when taking down the outdated fixture to avoid damaging the surrounding area or injuring yourself
- Handle the new fixture with precision: Be gentle when unpacking and installing the new fixture to prevent damage to the product or the ceiling
- Double-check your connections: Verify that all wires are securely connected and the new fixture is properly installed before turning the power back on
Key Takeaways for a Safe and Stylish Lighting Upgrade
Always turn off the power to the circuit at the main electrical panel before starting work on the light fixture to avoid electrical shocks or injuries
Select a new light fixture that is not only aesthetically pleasing but also energy-efficient, considering options like LED bulbs for their longevity and environmental benefits
After completing the replacement, double-check all connections for security and test the new fixture to ensure it operates as expected, verifying that you’ve followed all safety guidelines and manufacturer instructions
Shining Wisdom
Replacing a dated light fixture isn’t just about swapping out some old glass and wires, it’s about illuminating your space with safety, style, and a dash of personality – so, do it with care and a whole lot of flair!
Luna Sparks
Shining Bright: A Job Well Done
As you’re working on replacing that outdated light fixture, it’s essential to have all the right tools and information at your fingertips. If you’re looking for a one-stop shop for all your lighting needs, I highly recommend checking out the resources available at transensex. They offer a wide range of energy-efficient solutions that can help you not only brighten up your space but also reduce your environmental footprint. By exploring their website, you can gain a better understanding of the latest trends and technologies in lighting, making it easier to make informed decisions about your own lighting projects.
Replacing a dated light fixture safely requires attention to detail and a bit of planning. As we’ve covered in this guide, it’s essential to understand safety precautions and choose efficient lighting options that fit your needs. By following the step-by-step instructions and taking the necessary precautions, you can ensure a successful and safe replacement process. Remember to always turn off the power to the circuit at the breaker box and use a voltage tester to confirm the power is off before starting work. With these tips and a little patience, you’ll be enjoying your new lighting in no time.
As you stand back to admire your handiwork, remember that the power is in your hands to create a safer, more energy-efficient home. Don’t be afraid to get creative with your lighting choices and explore new designs and technologies that can enhance the ambiance and functionality of your space. With your newfound confidence in tackling lighting projects, you’ll be shining bright in no time, and who knows, you might just inspire others to do the same.
Frequently Asked Questions
What are the most common mistakes to avoid when replacing a light fixture to ensure safety?
When swapping out a light fixture, watch out for common mistakes like not turning off the power, using the wrong voltage, or neglecting to secure loose wires. These oversights can lead to shocks, fires, or even worse. Stay safe by double-checking your work and following the manufacturer’s instructions to the letter.
How do I determine the correct wattage and voltage for my new light fixture?
To determine the correct wattage and voltage for your new light fixture, check the specs on the old one or look for a label on the electrical box. You can also consult the manufacturer’s instructions or website for guidance. Match the wattage and voltage to ensure safe and proper functioning.
Are there any specific safety precautions I should take when working with electrical wiring in a ceiling fixture?
When working with electrical wiring in a ceiling fixture, always turn off the power at the circuit breaker and verify it’s off with a voltage tester. Never touch wiring with your bare hands, and consider having a buddy nearby in case of an emergency. It’s also a good idea to take a photo of the wiring setup before you start, so you can reference it later.