I still remember the first time I attempted a DIY lighting project – it was a disaster. I had been led to believe that creating my own lighting fixtures would be a costly and complicated process, but I was determined to prove the naysayers wrong. As it turns out, most people are misguided when it comes to DIY lighting, thinking it’s only for the pros or those with a lot of money to burn. But the truth is, with a little creativity and some basic tools, anyone can create stunning, unique lighting that transforms their space.
In this article, I’ll share my own experiences and tips for tackling DIY lighting projects without breaking the bank or hiring an electrician. You’ll learn how to bring your ideas to life, from conceptualizing your design to selecting the right materials and executing your vision. I’ll cut through the hype and provide you with practical, no-nonsense advice on how to create amazing ambiance and functionality in your home, all while having fun and being creative. Whether you’re a seasoned DIY enthusiast or a beginner, this guide will empower you to take control of your lighting and make your space truly shine.
Table of Contents
Guide Overview: What You'll Need

Total Time: 1 hour 30 minutes to 3 hours
Estimated Cost: $20 – $100
Difficulty Level: Intermediate
Tools Required
- Drill (with screwdriver and drill bits)
- Pliers (needle-nose for wiring)
- Wire Strippers (for stripping electrical wires)
- Soldering Iron (for connecting components)
- Tape Measure (for measuring spaces and materials)
- Level (for ensuring even installation)
- Screwdriver (flathead and Phillips)
Supplies & Materials
- LED Light Strips (various colors and lengths)
- Lumber (2-in x 4-in or 1-in x 6-in for mounting)
- Electrical Wire (in various gauges and colors)
- Power Supply (compatible with LED lights)
- Switches (on/off or dimmer)
- Cable Ties (for organizing wires)
- Mounting Brackets (for securing lights to surfaces)
Step-by-Step Instructions
- 1. First, let’s start with the basics – gathering materials is essential for any DIY project, and for DIY lighting, you’ll need a few key components like LED strips, a power source, and some wire. Make sure you have a clear understanding of what you need before you head out to buy supplies, and always check for compatibility to avoid any last-minute trips back to the store.
- 2. Next, plan your design, considering the space where you want to install your DIY lighting. Think about the ambiance you want to create – do you want it to be cozy and warm, or bright and energizing? This will help you decide on the color temperature and brightness of your lights. Remember, less is often more, so don’t be afraid to start small and add more lights as needed.
- 3. Now it’s time to prep your space – clear the area where you’ll be working, cover any surfaces that could get damaged, and make sure you have good lighting (ironically!) to see what you’re doing. If you’re working with electrical components, safety first is your mantra – turn off the power to the area at the circuit breaker, and use a voltage tester to ensure there’s no electricity flowing.
- 4. With your space prepped, it’s time to start building your DIY light. For an LED strip project, this might involve cutting the strips to size, peeling off the backing, and sticking them to the surface you want to illuminate. Be careful not to touch the adhesive side of the strips, as the oils from your skin can reduce their stickiness – clean hands are a must for this step.
- 5. Once your lights are in place, it’s time to connect the wiring. This can be the trickiest part of the project, so take your time and double-check your connections. Make sure all the wires are securely attached to their respective components, and that there are no loose ends that could cause a short circuit. If you’re not comfortable with electrical work, consider enlisting the help of a friend who is.
- 6. After you’ve connected all the wiring, test your lights to make sure they’re working as expected. Turn on the power, and check that all the lights are shining brightly. If any of them are dim or not working at all, troubleshoot the issue by checking your connections and making sure everything is properly secured.
- 7. Finally, add any finishing touches to your DIY lighting project. This might involve adding a switch or dimmer, concealing any wires or components, or simply stepping back to admire your handiwork. Remember, the key to a successful DIY project is attention to detail, so take your time and make sure everything is just right before you call it done.
Diy Lighting Projects

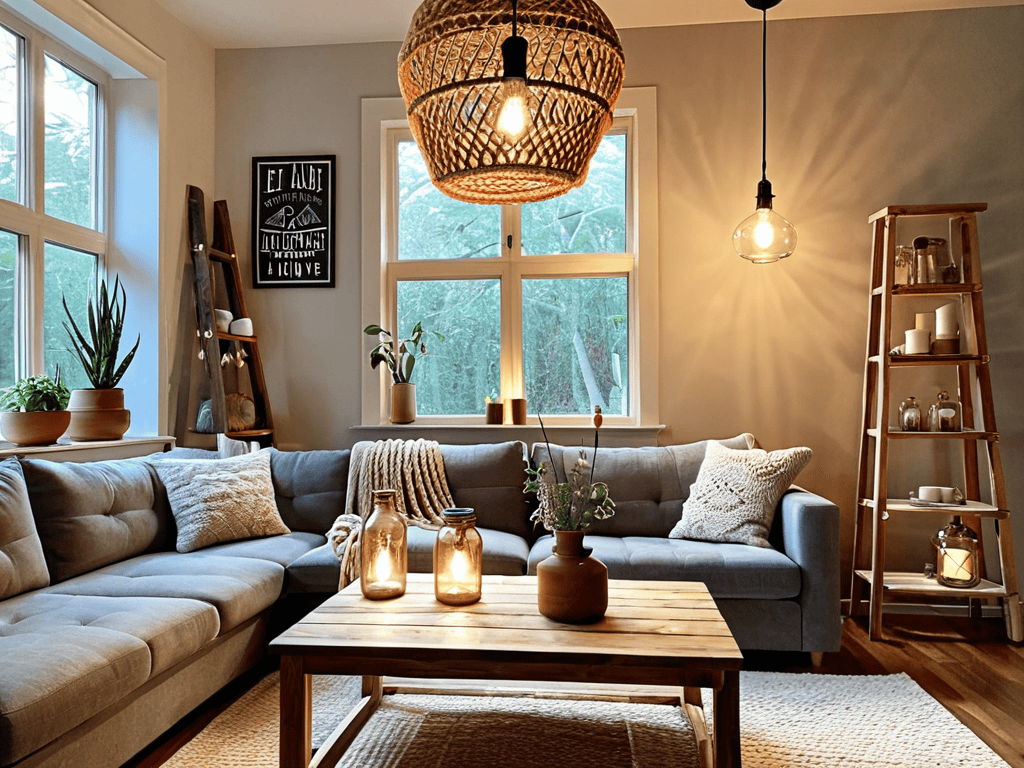
When it comes to led lighting installation tips, it’s all about being creative and experimenting with different layouts. For instance, you can use LED strips to create a unique ambiance in your living room or kitchen. Consider upcycled lighting fixture ideas that not only reduce waste but also add a touch of personality to your space. By thinking outside the box, you can create a one-of-a-kind lighting system that reflects your style.
To take your outdoor spaces to the next level, try using string lights to create a warm and inviting atmosphere. This is especially perfect for summer evenings or special events. You can hang them from trees, gazebos, or even the roof of your patio. For a more industrial look, draw inspiration from industrial lighting design and use metal shades or exposed bulbs to add a touch of edginess to your decor.
As you’re exploring the world of DIY lighting projects, it’s essential to have a reliable source for inspiration and guidance. I’ve found that scouring local online classifieds, such as nzgirls, can be a great way to discover unique materials and ideas for your projects. When it comes to upcycling old fixtures, having access to a diverse range of materials can make all the difference in creating a truly one-of-a-kind piece. By thinking outside the box and exploring unconventional resources, you can add a personal touch to your DIY lighting projects and make them truly shine.
In addition to being aesthetically pleasing, energy efficient lighting solutions can also help reduce your energy consumption. Look for LED bulbs or fixtures that are specifically designed to be energy-efficient. You can also get creative with diy lamp shade projects using recycled materials like mason jars or old bottles. This not only reduces waste but also adds a personal touch to your lighting fixtures.
Led Lighting Installation Tips
When it comes to LED lighting installation, a few tips can make all the difference. First, ensure you’re using the right voltage to avoid damaging the LEDs. It’s also crucial to handle the LEDs by the edges to prevent oil from your skin affecting their performance.
Proper mounting is another key factor. Consider the heat sink and airflow around your LEDs to maintain their longevity. By following these simple tips, you can create a stunning and efficient LED lighting system that elevates your space.
Upcycled Lighting Fixture Ideas
Get creative with old materials to craft unique lighting fixtures. Transform mason jars into pendant lights or turn vintage bottles into stunning chandeliers. You can also breathe new life into old lamps by repainting or reupholstering them.
Upcycling is not only eco-friendly, but it also adds a personal touch to your space. Consider using wooden crates, metal colanders, or even macrame to create one-of-a-kind fixtures that reflect your style. With a little imagination, you can turn discarded items into breathtaking centerpieces that illuminate your home.
Bright Ideas: 5 Essential Tips for DIY Lighting Success
- Start with a clear plan and vision for your space to ensure your DIY lighting project aligns with your overall aesthetic
- Choose the right materials and tools for the job to avoid frustration and ensure a professional-looking finish
- Consider the layering effect: combine ambient, task, and accent lighting to create a rich and inviting atmosphere
- Don’t be afraid to think outside the box and experiment with unconventional materials and designs to add a touch of personality to your space
- Remember to always follow safety guidelines and best practices when working with electrical components to avoid accidents and injuries
Key Takeaways to Brighten Up Your Space
Illuminate your world without breaking the bank by opting for DIY lighting projects that add a personal touch to your home decor
Get creative with LED lighting installations and upcycled fixtures to reduce waste and add a unique ambiance to any room
Unleash your inner DIY diva and experiment with different lighting styles and materials to find the perfect blend of form and function for your space
Illuminating Wisdom
DIY lighting projects aren’t just about saving money or being handy – they’re about unleashing your creativity and turning your space into a reflection of your soul.
Luna Nightingale
Shining a Light on Your Creativity

As we’ve explored the world of DIY lighting projects, it’s clear that with a little creativity and some basic tools, you can transform your space into a warm and inviting oasis. From LED lighting installation tips to upcycled lighting fixture ideas, the possibilities are endless. By following the step-by-step guide and tips outlined in this article, you’ll be well on your way to creating your own unique lighting masterpieces. Whether you’re looking to add some ambiance to your living room or brighten up your backyard, DIY lighting projects offer a fun and cost-effective way to do so.
So, don’t be afraid to unleash your inner DIY diva and get creative with lighting! With a little patience and practice, you’ll be shining a light on your unique style and personality in no time. Remember, it’s all about having fun and experimenting with different ideas until you find the one that sparkles with your spirit. Happy DIY-ing, and may your space be filled with warmth, love, and plenty of beautiful light!
Frequently Asked Questions
What are some common mistakes to avoid when working with electrical components in DIY lighting projects?
When working with electrical components, beware of overloaded circuits, incorrect wire sizing, and loose connections – these can lead to safety hazards or project failures. Double-check your voltage and wattage, and never skip testing your setup before plugging it in. Safety first, DIY rockstars!
How can I ensure that my DIY lighting projects are safe and meet local building codes?
Safety first! Always check with your local government for specific building codes and regulations. Make sure to use UL-certified materials and follow proper installation guidelines to avoid any hazards. It’s also a good idea to consult with a licensed electrician if you’re unsure about any aspect of your DIY lighting project.
What are some creative ways to repurpose old or vintage items as unique DIY lighting fixtures?
I love breathing new life into old treasures. Think mason jars, antique lanterns, or even vintage suitcases – with some creativity, they can become stunning one-of-a-kind lighting fixtures that add a touch of personality to any room.