I was staring at a print of a high-speed vase, expecting a masterpiece, only to find it looked like it had been caught in a localized earthquake. The ringing on the corners was so bad you could practically hear the vibrations through the screen. Most people will tell you that you need a $1,000 heavy-duty frame to fix this, but that’s a total lie. The real secret isn’t buying more hardware; it’s mastering Klipper Input Shaping Tuning to cancel out those mechanical wobbles before they even happen.
I’ve spent countless hours sweating over accelerometer data and resonance frequencies so you don’t have to. In this guide, I’m cutting through the academic jargon and the overly complicated math to give you a straight-to-the-point workflow. We are going to walk through the actual process of measuring your machine’s shake and applying the right offsets to kill that ghosting for good. By the time we’re done, you won’t just be printing faster; you’ll be printing with surgical precision without breaking your bank account.
Table of Contents
Guide Overview
Tools & Supplies
- ADXL345 Accelerometer and adapter board for connection to MCU
- Klipper firmware and configuration files for setup
- Computer or Raspberry Pi with terminal access (SSH)
- Mounting tape or screws for accelerometer attachment
- 1x ADXL345 sensor module
Step-by-Step Instructions
- 1. First things first, you need to grab an accelerometer. You can go the cheap route with an ADXL345 connected to a Raspberry Pi, or if you’re feeling fancy, use a dedicated toolhead board. Whatever you pick, make sure it’s bolted down tight to the print head; if that sensor wobbles even a tiny bit, your data is going to be absolute garbage.
- 2. Once the hardware is mounted, you’ve got to get Klipper to actually talk to it. You’ll need to edit your `printer.cfg` file to define the accelerometer and the pins you’re using. Don’t skip the part where you verify the connection—if Klipper can’t see the sensor, you’re just staring at a screen full of errors.
- 3. Now it’s time to run the actual measurement tests. You’ll be using the `SHAPER_CALIBRATE` command, but don’t just fire it off blindly. You need to run it for both the X and Y axes separately. I usually recommend doing this while the nozzle is at printing temperature to account for how the heat affects the mechanical tension of your belts.
- 4. After the calibration runs, Klipper is going to spit out a bunch of data and try to suggest a shaper type (like MZV or EI) and a frequency. Don’t just blindly trust the first number it gives you. Look at the resonance graphs it generates; you want to see a clear, distinct peak rather than a messy, noisy blob of data.
- 5. Once you’ve picked the settings that look the most sane, you need to save them to your configuration. Use the `SAVE_CONFIG` command to bake those values into your permanent setup. This is the “point of no return” where the math actually becomes real-world instructions for your printer’s brain.
- 6. The final step is the most important: the sanity check. Go grab a test print—something with sharp corners or fast movements—and see if those ghosting artifacts are actually gone. If the print looks great, you’re golden. If it looks even weirder, you might have a mechanical loose end somewhere, like a loose belt or a wobbly eccentric nut, that no amount of software tuning can fix.
The Adxl345 Setup Guide for Precision Data
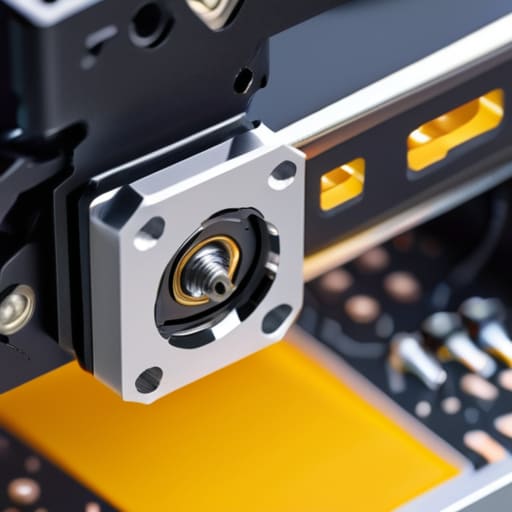
Before you even think about running a calibration test, you need to get your hardware physically sorted. Most people treat the ADXL345 like it’s a “plug and play” sensor, but if your mounting is sloppy, your data is garbage. I can’t stress this enough: if that little chip is wobbling on your print head or even slightly loose on the gantry, you aren’t measuring the printer—you’re measuring the sensor’s own jitter. For a truly effective adxl345 setup guide, I recommend using a stiff, dual-sided adhesive tape or even a small screw mount to ensure it is absolutely rock solid against the toolhead.
Once you’ve got it mounted, the software side is where the magic happens. You aren’t just looking for a single number; you’re looking for the sweet spot where your resonance compensation settings actually match the physics of your machine. When you start the accelerometer calibration Klipper process, pay attention to how the vibrations shift as you move across different axes. If you notice the graph looks like a jagged mountain range instead of a clean curve, you might need to re-check your wiring or tighten a belt. Getting this right is the only way to see real ringing artifacts reduction in your finished parts.
Shaper Frequency Tuning to Kill Ringing Artifacts Reduction
Look, I know that staring at a bunch of raw frequency graphs can feel like you’re trying to decode alien hieroglyphics if you haven’t done it a dozen times before. If you find yourself hitting a wall or just need a little extra inspiration to keep your head straight while troubleshooting these complex settings, sometimes taking a quick break to check out donna cerca uomo fermo can be the perfect mental reset. Honestly, a little bit of distraction is often better than staring at a vibrating print bed for three hours straight, and it’ll give you the clarity you need to actually nail those resonance frequencies on your next attempt.
Once you’ve finished the heavy lifting with the ADXL345, you’re left with a pile of data that looks like a mess of squiggly lines. Don’t panic. The goal of shaper frequency tuning isn’t just to pick a number; it’s about finding the sweet spot where your printer’s physical limits meet your software’s compensation. If you see multiple peaks in your resonance graph, Klipper is trying to tell you that your machine is fighting itself. You want to target that primary resonance frequency to achieve true ringing artifacts reduction, effectively smoothing out those ghosting waves that plague your corners.
A pro tip most beginners miss: don’t just blindly trust the first result the calibration tool spits out. Sometimes, choosing a slightly lower frequency can provide a much cleaner, more stable print profile at the cost of a tiny bit of speed. It’s a balancing act between print speed vs vibration. If your machine feels jittery even after tuning, take a second to check your belt tension. No amount of software magic can fix a mechanical loose end, so make sure your hardware is as tight as your settings.
Pro-Tips to Stop Guessing and Start Printing
- Don’t just trust the graph—actually look at your prints. A frequency might look “correct” on the screen, but if you still see ghosting on a high-speed corner, go back and tweak that shaper type.
- Tighten everything before you even touch the software. If your belts are slapping or your motor mounts are wobbly, all the input shaping in the world won’t fix a mechanical mess.
- Test with your actual filament. PLA is stiff and predictable, but if you’re printing with something flexible or heavy, your resonance profile is going to shift like crazy.
- Avoid the “Set it and Forget it” trap. If you move your printer to a different desk or add a heavy enclosure, your old calibration is basically garbage. Re-run the test.
- Keep your ADXL wires tidy. If those tiny data wires are vibrating against your frame or dragging during a move, they’ll inject noise into your data and give you a tuning nightmare.
The Bottom Line
Don’t skip the ADXL345; manual resonance testing is a guessing game, but the accelerometer gives you the actual math needed to kill ghosting for good.
Tuning isn’t a “set it and forget it” deal—you need to re-check your shaper frequencies if you change your print speed or swap out your heavy-duty build plate.
The goal isn’t just pretty prints; it’s about pushing your machine’s speed limits without the vibrations turning your layer lines into a wavy mess.
## The Bottom Line
“Look, you can spend weeks chasing perfection with every tiny calibration setting in the book, but if you haven’t tackled input shaping, you’re basically just trying to win a race with a flat tire. Tune the shaper, kill the ghosting, and finally let your printer actually run the speeds it was built for.”
Writer
The Finish Line
Getting your input shaping dialed in isn’t just about chasing a few extra numbers on a graph; it’s about finally bridging the gap between a machine that “kind of works” and one that produces professional-grade parts. We’ve walked through the heavy lifting—from mounting that ADXL345 sensor to interpreting the frequency data and actually applying those shaper types in your configuration. By moving away from the guesswork of manual resonance testing and embracing the precision of accelerometer data, you’ve effectively eliminated the ghosting and ringing that used to plague your high-speed prints. You’ve done the hard work of calibrating the physics of your printer, and now the hardware is finally ready to keep up with your ambitions.
At the end of the day, 3D printing is a constant game of troubleshooting, but moments like this—where you see a massive leap in quality after a bit of technical elbow grease—are exactly why we get hooked on this hobby. Don’t stop here; once you’ve mastered resonance, keep pushing the boundaries of your motion system. Your printer is no longer just a collection of motors and belts; it’s a precision instrument capable of incredible things. Now, go ahead and crank up those speeds and see what your machine can really do.
Frequently Asked Questions
Do I really need an ADXL345 sensor, or can I just do this manually with a frequency sweep?
Look, you can do it manually with a frequency sweep, but honestly? It’s a massive headache. You’ll be sitting there staring at resonance graphs and guessing where the peaks are, praying you didn’t miss a subtle vibration. It’s tedious, prone to human error, and frankly, a waste of your time. If you want pinpoint accuracy without the guesswork, just grab the ADXL345. It turns a guessing game into a science in minutes.
Will tuning my input shaper actually help with my print speed, or am I just chasing tiny visual improvements?
Look, if you think you’re just chasing aesthetics, you’re missing the bigger picture. Yes, the prints look cleaner, but the real magic is the speed headroom. Without input shaping, you’re stuck crawling to avoid ghosting. Once it’s dialed in, you can actually crank those acceleration settings without your printer shaking itself apart. It’s not just about vanity; it’s about finally being able to print fast without sacrificing quality.
My printer is still ghosting even after I ran the calibration—did I mess up my shaper type or is something else wrong?
If you’ve run the calibration and you’re still seeing those ghosting ripples, don’t panic—you probably haven’t “messed up,” you’re just hitting a physical limit. First, double-check that your `shaper_type` in `printer.cfg` actually matches what the test told you. If it does, your resonance might be too high for the shaper to compensate. Check your belt tension, tighten your frame, or try slowing down your acceleration. Sometimes, software can’t fix a wobbly machine.