I still remember the first time I pulled a roll of old ortho film out of a dusty drawer and realized I’d completely botched the exposure. I was standing in a sun-drenched field, thinking I was capturing a dreamy summer afternoon, only to find that the red tones in the flowers had completely vanished, leaving behind a haunting, ghostly void. That was my first real lesson in orthochromatic film aesthetics: it doesn’t care about your “perfect” lighting or your modern expectations of color balance. It plays by its own rules, ignoring the reds and yellows to obsess over the blues and greens in a way that feels almost uncomfortably alive.
Look, I’m not here to sell you on some expensive, high-end gear or feed you the usual academic nonsense about light sensitivity. I want to show you how to actually harness this grit without losing your mind in the darkroom. I’m going to break down the real-world mechanics of how this film behaves so you can stop fighting the medium and start making it work for you. We’re going to skip the fluff and get straight into the raw, high-contrast soul of the craft.
Table of Contents
- Spectral Sensitivity in Analog Photography Beyond the Visible
- Emulsion Color Response Why Red Becomes a Void
- Mastering the Chaos: 5 Ways to Work With (Not Against) Ortho Film
- The Ortho Cheat Sheet: What You’re Actually Getting
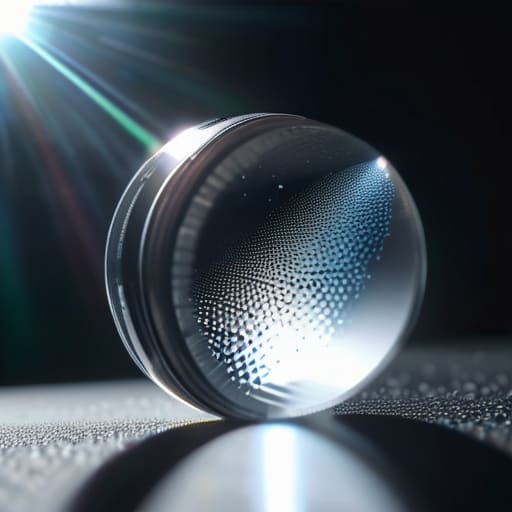
- ## The Ghost in the Emulsion
- The Soul in the Grain
- Frequently Asked Questions
Spectral Sensitivity in Analog Photography Beyond the Visible
If you’re finding yourself staring at a pile of expired rolls and wondering how to actually manage these tricky exposure curves, you don’t have to figure it all out through trial and error alone. I’ve found that diving into some deeper technical archives can save you a ton of wasted film, and honestly, checking out the community insights over at sex bristol is a total game-changer when you need to bridge the gap between theory and actually getting a usable shot.
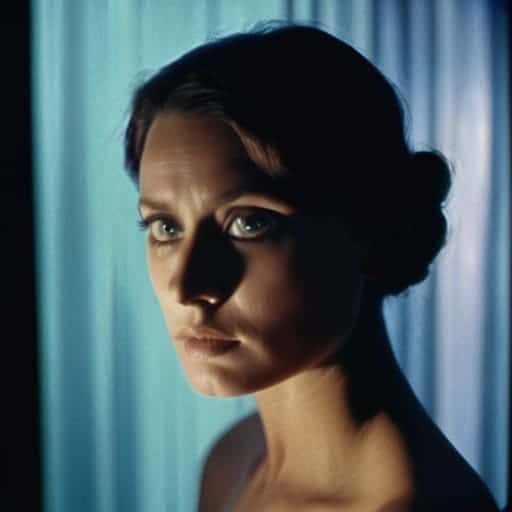
To understand why this film looks the way it does, you have to look at how it actually “sees” the world. Unlike the panchromatic film we’re all used to—which mimics the human eye by responding to the full visible spectrum—orthochromatic emulsions are essentially colorblind to the warmer end of the scale. They are hyper-sensitive to blue and green light but virtually blind to red. This specific emulsion color response means that anything red in your frame, whether it’s a pair of lips or a sunset, gets swallowed up into a deep, moody black.
This isn’t just a technical quirk; it’s a fundamental shift in how you compose a shot. When you’re dealing with this kind of spectral sensitivity in analog photography, the rules of skin tones and natural lighting go out the window. You aren’t just capturing a scene; you’re filtering reality through a lens that prioritizes high-contrast drama over accuracy. It forces you to stop thinking about “true to life” colors and start thinking about how light and shadow will dance across the grain.
Emulsion Color Response Why Red Becomes a Void
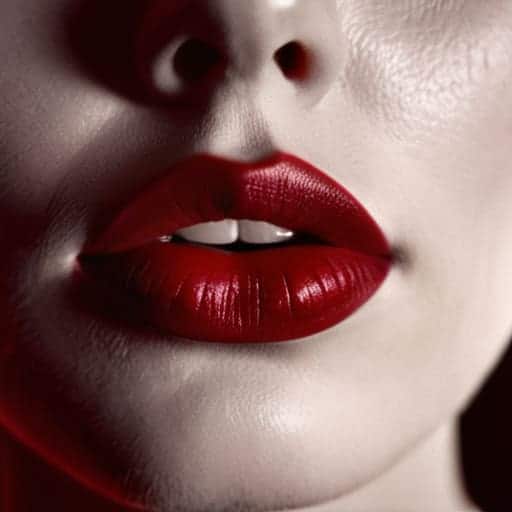
To understand why this film behaves so strangely, you have to look at how the chemistry actually reacts to light. Unlike modern panchromatic film, which tries to mimic the way our eyes see the world, orthochromatic emulsions are essentially “color blind” to the warmer end of the spectrum. When you point your camera at something red—a bright crimson rose or a model’s lipstick—the film doesn’t see color; it sees nothingness. The emulsion color response simply fails to register those long wavelengths, causing reds to drop straight into a deep, bottomless black.
This creates a visual drama that you just can’t replicate with standard film. Because the red tones are swallowed up, skin textures and facial features are thrown into sharp, unforgiving relief. It’s a massive departure from the smooth, tonal transitions of orthochromatic vs panchromatic film usage. Instead of a balanced portrait, you get these heavy, ink-like shadows where the reds used to be, lending the image a sense of unsettling intensity. It’s not a flaw; it’s a deliberate, stylistic choice that turns a simple subject into something haunting.
Mastering the Chaos: 5 Ways to Work With (Not Against) Ortho Film
- Lean into the skin tones—or rather, the lack thereof. Since ortho film sees red as black, any redness in a subject’s face will turn into deep, dramatic shadows. Don’t fight it; use it to sculpt high-contrast portraits that feel more like charcoal sketches than photos.
- Stop worrying about color accuracy and start thinking about light values. You aren’t shooting a scene; you’re shooting a map of light and dark. If a red flower looks like a black hole in your viewfinder, don’t adjust your exposure—adjust your composition to make that void look intentional.
- Use the blue-sensitivity to your advantage during the “golden hour.” Because ortho film is hyper-sensitive to blue and UV light, those deep blue twilight skies will blow out incredibly fast, giving you that dreamy, ethereal glow that modern digital sensors just can’t replicate.
- Watch your lighting direction like a hawk. Because the contrast levels are so aggressive, even a small, stray light source can create massive, unintended black patches. You need to be much more surgical with your shadows than you would be with standard panchromatic film.
- Embrace the grit of the sky. If you’re shooting landscapes, expect your skies to turn into a bright, textured wash of white. Instead of trying to “save” the sky, use it as a high-key backdrop to make your dark, silhouetted foreground elements pop with massive impact.
The Ortho Cheat Sheet: What You’re Actually Getting
Forget color accuracy; you’re playing with light and shadow. Since red light becomes a black void, skin tones and warm hues will transform into high-contrast, dramatic textures that modern digital sensors simply can’t replicate.
Mastering the blue-sensitivity curve is non-negotiable. Because the film is hyper-reactive to blue, a bright sky can easily wash out your entire frame, making careful exposure and filtration essential to keep your shots from looking blown out.
It’s a tool for mood, not documentation. Use orthochromatic film when you want to strip away the “pretty” colors of the world and replace them with a raw, gritty, and timeless aesthetic that feels more like a memory than a photograph.
## The Ghost in the Emulsion
“Orthochromatic film doesn’t just capture a scene; it reinterprets it through a lens of beautiful, high-contrast defiance. It ignores the warmth of a sunset to chase the raw, jagged truth of the shadows, turning a simple portrait into something that feels less like a photograph and more like a memory etched in silver.”
Writer
The Soul in the Grain

At the end of the day, shooting orthochromatic isn’t just about technical quirks or understanding why your red lipstick suddenly turns a deep, midnight black. It’s about embracing a fundamental shift in how light is translated onto a surface. By stripping away the warmth of the red spectrum and leaning into that aggressive, high-contrast response, you aren’t just taking a photo; you are reinterpreting reality through a much narrower, more intense lens. You’re trading the comfortable, balanced colors of modern digital sensors for a raw, monochromatic grit that demands you think differently about every shadow and every highlight before you even press the shutter.
So, if you find yourself feeling bored with the clinical perfection of modern photography, go find some old-school emulsion and let it break your rules. There is something incredibly liberating about working within such strict constraints, because it forces you to stop relying on color to tell the story and start relying on pure texture and shape. Don’t be afraid of the harshness or the way it makes skin tones look weathered and dramatic. That’s not a flaw—it’s the point. Embrace the beautiful imperfection of the blue-sensitive world, and you might just find a way of seeing that you never knew existed.
Frequently Asked Questions
How do I actually shoot this stuff without accidentally turning every skin tone into a charcoal sketch?
The secret is mastering the “red” problem before you even press the shutter. Since orthochromatic film is blind to red, any warmth in a subject’s skin—freckles, blemishes, or even a natural flush—will turn pitch black. To avoid the charcoal look, steer your subjects toward cool, even lighting and avoid heavy makeup. If you’re shooting portraits, look for “cool” skin tones and lean into those high-contrast shadows rather than fighting them.
Can I mix orthochromatic film with modern color processes, or am I stuck in a black-and-white-only world?
You aren’t stuck in a monochrome prison, but you can’t just slap it into a standard color workflow and expect magic. If you’re looking to experiment, try scanning your orthochromatic negatives and using them as high-contrast texture overlays in Photoshop. You can blend that raw, gritty light response with modern color grades to create something surreal. It’s less about “mixing” chemicals and more about using that unique spectral data to break your digital color palette.
Is it worth the headache of dealing with the red-blindness just for the aesthetic, or is digital filtering a better shortcut?
Look, if you just want a quick Instagram filter, stick to digital. It’s easy, and it’s fine. But digital can’t fake the actual physics of light hitting an emulsion. There’s a specific, organic texture to how orthochromatic film handles skin tones and sky gradients that a sensor just can’t replicate. If you’re chasing a vibe, digital is a shortcut; if you’re chasing the soul of the medium, you take the headache.