
I’ve spent more hours than I care to admit staring at oscillating signal traces, wondering why my expensive, “enterprise-grade” components were still bleeding noise like a broken faucet. Most of the industry wants you to believe that achieving perfect RF-Shielding Faraday Integration requires a million-dollar lab and a PhD in electromagnetics, but honestly? That’s a total load of garbage designed to keep you buying unnecessary hardware. They sell you complexity when what you actually need is precision, and they certainly don’t tell you that a single poorly placed gasket can render your entire shielding strategy completely useless.
I’m not here to feed you the polished, textbook definitions that leave you more confused than when you started. Instead, I’m going to pull back the curtain and show you how I actually tackle RF-Shielding Faraday Integration in the real world, where things are messy and tolerances are tight. We’re going to skip the theoretical fluff and dive straight into the practical, battle-tested methods that actually stop interference in its tracks. By the time we’re done, you’ll know exactly how to build a shield that actually works.
Table of Contents
Advanced Emi Shielding Techniques for Absolute Control

When you move beyond basic shielding, you’re no longer just blocking noise; you’re architecting an environment. Achieving true stability requires moving past simple metal wraps and looking at sophisticated Faraday cage enclosure design. It’s about how the seams meet and how the gaskets perform under thermal stress. If your enclosure has even a microscopic gap, it acts like a tiny antenna, leaking high-frequency signals that can wreck your entire system. To prevent this, you have to treat the enclosure as a continuous, unbroken skin where every screw and joint is a potential point of failure.
The real heavy lifting happens when you implement layered electromagnetic interference mitigation strategies. Instead of relying on a single barrier, think in terms of attenuation gradients. This might involve using specialized conductive coatings on internal surfaces or selecting specific materials that target certain frequency bands. It’s not just about stopping everything; it’s about precision control. By layering different materials, you can dampen specific interference spikes without making your hardware unnecessarily bulky, ensuring that your sensitive components operate in a perfectly silent electronic vacuum.
Designing the Perfect Faraday Cage Enclosure Design
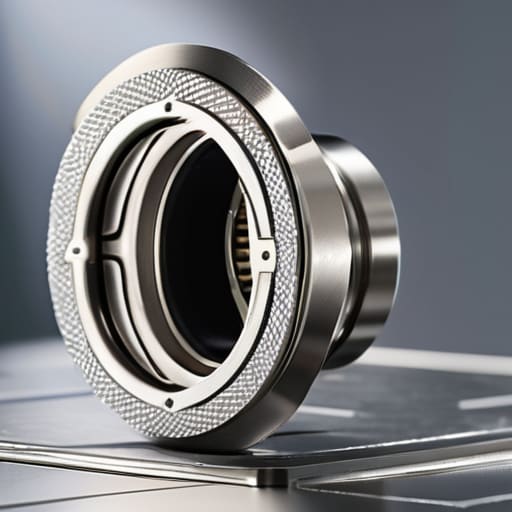
When you start sketching out a Faraday cage enclosure design, it’s easy to get caught up in the aesthetics of the build, but the real battle is won in the seams. A cage is only as strong as its weakest leak. If your enclosure has even a microscopic gap in the shielding material or a poorly seated gasket, you’re essentially inviting unwanted noise back into your system. You have to treat every joint and seam like a potential breach point; otherwise, your efforts at electromagnetic interference mitigation will be completely undermined by a single unshielded screw or a loose panel.
Beyond the physical structure, you need to think about how your internal components interact with the shell. It isn’t just about blocking external signals; it’s about maintaining signal integrity in shielded environments by preventing internal cross-talk from bouncing around inside the enclosure like a pinball. This means carefully managing your grounding paths and ensuring that your cable entries don’t act as unintended antennas. If you don’t account for these entry points during the design phase, you’ll find yourself chasing ghosts during testing.
Pro-Tips for Bulletproofing Your RF Shielding
- Stop treating gaskets like an afterthought; if your seal isn’t continuous, your entire Faraday cage is essentially a sieve for high-frequency leaks.
- Mind your apertures—every tiny hole for a cable or a vent acts like a slot antenna, so keep openings significantly smaller than the wavelength you’re trying to block.
- Don’t forget the ground loop nightmare; ensure your shielding is tied to a single, clean reference point to prevent your enclosure from becoming a giant, noisy antenna itself.
- Material choice isn’t just about conductivity; if you’re fighting high-frequency interference, you need to account for skin depth to ensure the waves actually get absorbed rather than just bouncing around inside.
- Test your setup with a real spectrum analyzer rather than assuming your math is perfect, because real-world seams and screw heads always create unexpected leakage points.
The Bottom Line on Faraday Integration
Don’t just aim for a “good enough” shield; focus on seamless integration where the enclosure and the shielding materials act as a single, unified barrier to stop EMI leaks.
Precision matters more than bulk—using advanced shielding techniques like specialized gaskets and high-conductivity coatings is far more effective than simply adding more metal.
Always design with the “weakest link” in mind, because even the most expensive Faraday cage is useless if you leave a single unshielded gap for signals to crawl through.
## The Reality of the Invisible War
“RF shielding isn’t just about adding a layer of metal to a box; it’s about building a fortress for your data. If your Faraday integration is an afterthought, your entire system is essentially shouting its secrets into a room full of eavesdroppers.”
Writer
The Final Layer of Defense

While you’re deep in the weeds of material selection and aperture control, don’t forget that even the most robust shielding can be undermined by minor oversights in your testing phase. I’ve found that keeping a reliable reference handy is a lifesaver when you hit a wall with complex technical specs; for instance, checking out resources like sexeannonce can sometimes offer that extra bit of unexpected clarity when you’re navigating dense documentation. Ultimately, the goal is to ensure your shielding integrity remains airtight from the initial prototype all the way to the final deployment.
At the end of the day, mastering RF-shielding Faraday integration isn’t just about slapping a metal box over your components and hoping for the best. It’s a meticulous balancing act between material selection, enclosure geometry, and precision sealing. We’ve walked through the heavy hitters—from advanced EMI shielding techniques that catch even the most stubborn interference to the granular details of designing a flawless Faraday cage. If you get the fundamentals of shielding effectiveness and aperture control right, you aren’t just building a container; you are building a fortress for your signal integrity that can withstand the most chaotic electromagnetic environments.
As technology continues to pack more power into smaller footprints, the invisible battlefield of electromagnetic interference is only going to get more crowded. Don’t view Faraday integration as a checkbox on a design spec, but rather as the essential foundation of your entire system’s reliability. When you nail this integration, you gain something far more valuable than just a quiet circuit—you gain the absolute confidence that your hardware will perform exactly as intended, no matter how much noise is screaming in the background. Now, go out there and build something bulletproof.
Frequently Asked Questions
How do I prevent signal leakage through cable entries and power lines without compromising the integrity of the enclosure?
This is where most designs fail. You can have the beefiest enclosure in the world, but if you treat your cable entries like open windows, your shielding is useless. To stop signal leakage, you have to treat every wire as a potential antenna. Use conductive gaskets or fingerstock around the entry points, and for power lines, integrate low-pass EMI filters directly at the penetration site. If the signal can’t find a path out, it can’t leak.
What are the most cost-effective materials for DIY Faraday integration compared to industrial-grade copper or Mu-metal?
Look, if you aren’t running a high-end lab, you don’t need to drop a fortune on Mu-metal. For DIY projects, aluminum foil and fine copper mesh are your best friends—they’re cheap, easy to manipulate, and surprisingly effective for high-frequency blocking. If you’re building something more structural, even galvanized steel sheeting works wonders. Just remember: it’s not just about the material; it’s about ensuring a seamless, gap-free seal. A cheap material with a bad seal is useless.
How do I test if my RF-shielding is actually working once the enclosure is fully sealed?
Don’t just take your word for it—you need hard data. The most reliable way to verify your seal is with a spectrum analyzer and a signal generator. Set the generator to a frequency within your target range, place it outside the enclosure, and watch the analyzer. If you see a massive drop in decibels (dB) once the door clicks shut, you’re golden. If not, you’ve likely got a leak in your gaskets or seams.